
Make Cafe Quality Coffee at Home: A Barista Guide

Cafe-quality coffee is defined by three things: taste consistency, proper extraction, and the sensory experience of a well-crafted cup. You can make cafe quality coffee home with the right equipment, fresh beans, and a disciplined brewing process. The gap between your kitchen and your favorite coffee shop is smaller than you think. The standard 1:2 espresso ratio (18g of coffee yielding 36g of liquid) is the same whether you’re behind a commercial bar or your kitchen counter. Master that ratio, dial in your grind, and texture your milk correctly, and you’re already brewing barista-quality coffee.

What equipment do you need to make cafe quality coffee at home?
The grinder is the single most important piece of equipment you own. Burr grinders produce uniform particles, while blade grinders create a mix of dust and chunks that cause both bitterness and sourness in the same cup. That uneven grind is the most common reason home coffee tastes flat or harsh. Invest in a quality burr grinder before upgrading anything else.
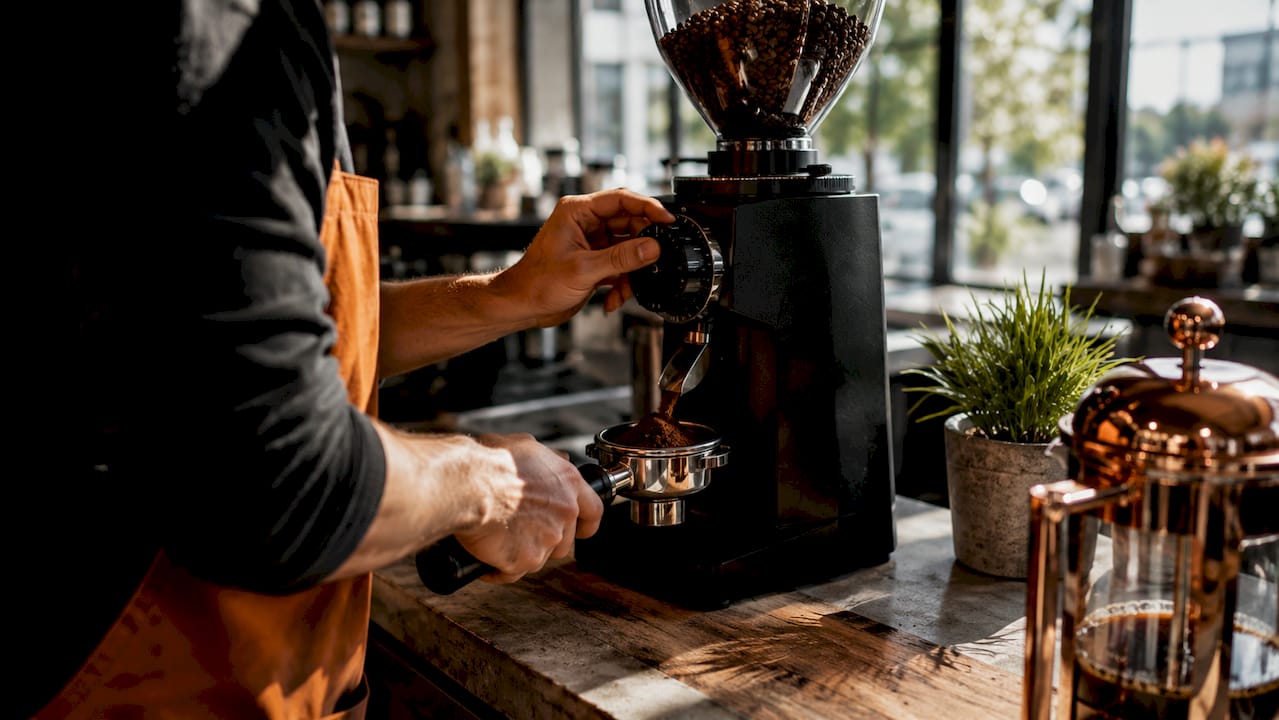
Your espresso machine needs to maintain stable pressure (around 9 bars) and consistent brew temperature. Entry-level machines with single boilers can work well, but thermal stability matters more than brand prestige. A machine that swings wildly in temperature will produce inconsistent shots no matter how good your technique is.
Beyond the grinder and machine, these tools make a real difference:
- Digital kitchen scale with 0.1g precision for weighing dose and yield
- Tamper sized to your portafilter basket (58mm is standard for most home machines)
- WDT distribution tool to break up clumps and distribute grounds evenly before tamping
- Milk frothing pitcher (12 oz for single drinks, 20 oz for multiple)
- Knock box for spent puck disposal
- Thermometer or a machine with a built-in temperature gauge
Pro Tip: Buy the best grinder your budget allows, then get a mid-range machine. A great grinder with an average machine beats an average grinder with a great machine every single time.
How to select the right beans for cafe-style coffee
Fresh beans are non-negotiable. Espresso tastes best with beans roasted 7 to 21 days prior to brewing. Too fresh and the coffee is gassy, producing unstable crema and sour notes. Too old and the flavors go flat. Check the roast date on every bag you buy, and skip anything without one printed clearly on the label.
The benefits of whole bean coffee over pre-ground are significant. Grinding fresh preserves volatile aromatic compounds that disappear within minutes of grinding. Pre-ground coffee, even stored well, loses complexity fast.
For espresso, medium to dark roasts tend to pull more balanced shots. Lighter roasts can work beautifully but require finer grind adjustments and longer extraction times. Different coffee bean origins also shape flavor dramatically. Ethiopian beans bring floral and fruit notes. Brazilian beans lean toward chocolate and nuts. Knowing your origin helps you predict how a bean will behave in the cup.
Storage tips to keep beans fresh:
- Store in an airtight container away from light and heat
- Keep at room temperature, not in the freezer (unless buying in bulk)
- Buy in smaller quantities (250g–500g) to stay within the freshness window
- Never store beans in the bag they came in once opened
Pro Tip: Check the roast date on your bag before you buy. A bag roasted six weeks ago is already past its best, regardless of how good the beans are.
Step-by-step guide to pulling a great espresso shot
A standard home espresso recipe starts with 18g of ground coffee and targets a 36g liquid yield in 25–30 seconds. That 1:2 ratio is the foundation of every balanced shot. Weigh both your dose and your yield every single time, at least while you’re learning.
Follow this sequence for each shot:
- Warm up your machine and portafilter for at least 15–20 minutes before brewing. A cold portafilter drops shot temperature by 2–3°C, which causes sourness and under-extraction.
- Grind your dose directly into the portafilter basket or a dosing cup.
- Use your WDT tool to stir the grounds in a circular motion. This breaks up clumps and prevents channeling, where water finds a path of least resistance through the puck instead of extracting evenly.
- Distribute evenly by tapping the portafilter gently or using a distribution tool before tamping.
- Tamp with a flat, level surface. Consistency in tamping matters more than force. An uneven tamp causes channeling far more reliably than tamping too lightly.
- Lock in and brew. Start your timer and scale simultaneously.
- Record your results. Note the dose, yield, and time for every shot.
Dialing in your espresso
Dialing in means adjusting your grind until the shot hits your target time and tastes balanced. Change one variable at a time. If you adjust grind size, dose, and temperature simultaneously, you cannot know which change fixed the problem.
| Taste | Problem | Fix |
|---|---|---|
| Sour or weak | Under-extracted | Grind finer or increase dose |
| Bitter or harsh | Over-extracted | Grind coarser or reduce dose |
| Fast shot (under 20 sec) | Too coarse | Grind finer |
| Slow shot (over 35 sec) | Too fine | Grind coarser |
Most beginners pull their first balanced shot within 10–30 attempts using this one-variable approach. That number sounds high, but each attempt teaches you something specific. Expect the process to take a few days, not a few minutes.
Pro Tip: Pull a blank shot (water only through the portafilter) before your first real shot each morning. It flushes residue and stabilizes the group head temperature.
How to steam and texture milk like a barista
Velvety microfoam is what separates a latte from a cup of coffee with hot milk poured in. Milk steaming has two distinct phases, and skipping either one produces frothy, bubbly milk instead of the silky texture you want.
Follow these steps:
- Fill your pitcher to just below the spout. Cold milk from the fridge works best.
- Purge the steam wand for one second to clear condensation.
- Submerge the wand tip just below the milk surface and open the steam valve fully.
- Stretching phase: Keep the wand tip near the surface to introduce air. You should hear a gentle hissing sound, not loud splattering. Do this for the first few seconds until the milk reaches about 100°F.
- Vortex phase: Submerge the wand tip deeper and angle the pitcher so the milk spins in a whirlpool. This integrates the air into the milk, creating smooth microfoam rather than large bubbles.
- Stop at 140–150°F. Above 160°F, milk proteins break down and sweetness disappears.
- Tap and swirl the pitcher on the counter to pop any large bubbles, then pour immediately.
Whole milk produces the richest, most stable microfoam. Barista-blend oat milk is the best non-dairy option. Standard oat milk and skim milk are harder to texture and produce thinner foam.
Pro Tip: If your foam looks bubbly after steaming, tap the pitcher firmly on the counter and swirl in tight circles for 10 seconds. Most bubbles will integrate before you pour.
What are common mistakes when brewing cafe-quality coffee at home?
The most damaging habit is changing multiple variables at once. Adjusting dose, grind, and temperature simultaneously makes it impossible to know what actually changed your shot. Fix one thing, pull a shot, taste it, then decide what to change next.
Channeling is the second most common problem. It happens when water finds a weak spot in the coffee puck and rushes through it instead of extracting evenly. The result is a shot that tastes both bitter and sour at the same time. Proper WDT distribution and a level tamp prevent most channeling before it starts.
Common mistakes and how to fix them:
- Using stale beans: Beans outside the 7–21 day freshness window produce flat, lifeless shots. Buy fresh and check the roast date.
- Skipping the warm-up: A cold machine and portafilter cause thermal instability. Always allow 15–20 minutes before pulling shots.
- Ignoring grinder retention: Purge 10–15g of grounds when switching to a new bag. Old retained grounds mix with fresh ones and throw off your dial-in.
- Eyeballing instead of weighing: Guessing your dose by volume leads to inconsistent shots. Use a scale every time.
- Tamping unevenly: A tilted tamp creates a channel on one side of the puck. Use a level surface and press straight down.
“The puck is where most shots are won or lost. Get your distribution and tamp right, and the machine just does its job. Skip that step, and no amount of expensive equipment will save the shot.”
Pro Tip: After tamping, look at the puck surface from eye level. It should be perfectly flat with no visible tilt. If it’s off, redistribute and tamp again.
Key Takeaways
Brewing barista-quality coffee at home requires fresh beans within the 7–21 day roast window, a burr grinder, precise dose and yield measurements, and a disciplined one-variable dial-in process.
| Point | Details |
|---|---|
| Grinder first | A quality burr grinder matters more than an expensive espresso machine. |
| Freshness window | Use beans roasted 7–21 days ago for the best espresso flavor and crema. |
| Weigh everything | Use a 0.1g scale to measure both your dose and your liquid yield every shot. |
| One variable at a time | Change only one thing per shot to accurately diagnose and fix flavor problems. |
| Milk texture requires two phases | Stretch to add air, then vortex to integrate it into smooth, velvety microfoam. |
Why technique beats gear every time
I’ve watched people spend $2,000 on an espresso machine and still pull sour, watery shots every morning. I’ve also seen someone with a $300 setup produce genuinely excellent coffee because they understood what they were doing. Cafe-quality coffee depends on technique and quality, not on the price tag of your equipment.
The thing most people skip is patience with the dial-in process. They pull one bad shot, change three things, pull another bad shot, and give up. The one-variable approach feels slow, but it’s the only way to actually learn what your specific grinder, machine, and beans need. After 20 or 30 shots, you start to recognize patterns. The process becomes intuitive.
What I tell anyone starting out: focus on freshness, consistent grinding, and accurate weighing before worrying about anything else. Those three habits alone will put your home coffee ahead of most cafes. The espresso roast profile you choose matters, but only once the fundamentals are solid. Get the basics right first, and the rest follows naturally.
— Tony
Fresh beans from The Flaming Bean make a real difference
Great technique only goes as far as your beans allow. The Flaming Bean’s Evening Roast is roasted to a smooth, approachable profile that works beautifully for home espresso and milk-based drinks alike. It’s the kind of coffee that rewards careful brewing without punishing beginners.
The Evening Roast ships freshly roasted, so you receive it well within the ideal 7–21 day freshness window. That means you can start dialing in with beans that are actually at their peak, not beans that sat in a warehouse for two months. If you’re building a home barista setup, starting with quality fresh coffee is the smartest first step you can take.
FAQ
What is the standard espresso ratio for home brewing?
The standard espresso ratio is 1:2, meaning 18g of coffee produces 36g of liquid in 25–30 seconds. This ratio is the starting point for dialing in any espresso recipe at home.
How many attempts does it take to dial in espresso?
Most beginners pull a balanced shot within 10–30 attempts using a one-variable-at-a-time approach. Expect the process to take a few days, not a single session.
Why does my espresso taste sour?
Sour espresso is under-extracted. The most common causes are a grind that is too coarse, a cold portafilter, or beans that are too fresh (under 7 days off roast). Grind finer or allow your machine to warm up fully before brewing.
What milk is best for steaming at home?
Whole milk produces the richest, most stable microfoam for lattes and cappuccinos. Barista-blend oat milk is the best non-dairy alternative for achieving a similar texture.
Do I need to weigh my espresso every time?
Weighing both your dose and yield is the fastest way to achieve consistent shots. Once you’ve dialed in a recipe and your grinder is stable, you can rely on muscle memory, but a scale removes guesswork during the learning phase.
Comments